22 November 2020 | by Gemma McFarlane
This year hasn’t been a good year for my vegetable plot. I haven’t been looking after my soil properly as I’ve been busy with other things and this year it showed. When I started planting at the beginning of the season, my soil felt like sand and after just a few days of dry weather, I could see it blowing away on a windy day. I had a feeling then that it wasn’t going to be productive.
It constantly rained from October last year until March. I’d left my soil bare so I assume any nutrients in there had washed away. I knew this winter I would need to add a lot of compost to my soil. I knew I couldn’t make enough this year and I didn’t want to buy compost so I researched other ways to improve my soil.
What has this got to do with water? Well, good soil contains more nutrients and important bacteria which is needed for successful growing but it also holds onto moisture. Seeds will grow better if the soil stays moist instead of it constantly drying out and having to be watered often. Certain soils can hold onto too much water too which needs to be managed in other ways. We have been having long dry spells of weather at planting time which is not what you want when seeds are germinating. Coupled with the long wet winters, the soil is getting a real bashing so I need to do more to look after it.
I researched green manures and found they have many advantages:
Disadvantages:
I planted my green manure at the end of September so it will start growing before the winter, slow down for winter but have enough roots to hold onto the soil, then I can keep an eye in early spring when to cut it back.
I’ve planted white clover after my brassicas, winter tares after my beans and squash plants and rye grass after my root crops.
I’ve also decided to mulch my vegetable beds next year during the growing season. I start my brassicas, beans and squash plants in the greenhouse so once I’ve cut down the green manure, I plan to cover the beds with cardboard and a thick layer of wood chippings which will decompose slowly over the next couple of years and feed the soil. I would have liked to add compost instead but this would be more expensive. I bought a van load of fresh wood chippings from a local tree surgeon very cheaply and have left it to rot down for three months to add to my vegetable and flower beds in the winter. The mulch should hold onto moisture and also keep the moisture in the soil for longer. I’ve read this could give slugs and snails more places to hide but I’m going to try it.
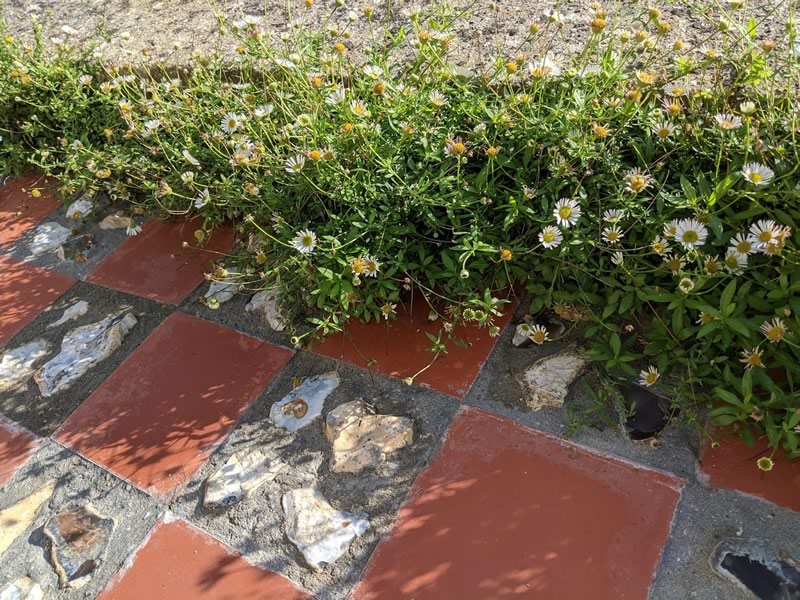
Erigeron growing from cracks in the wall
Some drought tolerant plants probably won’t like our increasingly wet winters so it is worth taking cuttings of these plants at the end of the season and store in a greenhouse, in a cold frame or inside the house on a windowsill, ready to plant out next spring.
If you don’t have space all year round, you could make a temporary cold frame. As well as protecting plants through the winter, a cold frame is useful to protect seedlings before planting outside in the spring. There are many websites giving advice on how to build a cold frame.
You can usually find the materials for free too:
Ask on the local selling or recycling pages for old windows or ask a local window fitter.
Once you have your windows and know the size, source your wood for the frame – ask again on the recycling websites / facebook pages or ask at the local tip; People are always getting rid of palettes.
I recommend fixing your panels together with butterfly screws so you can take them apart and put back together when needed again.
Install vessels to catch rainwater around the garden where you can.
I have containers hidden around the garden. Installing water butts is really important if you want to grow plants that need watering. Link to guttering on a shed or off the house guttering. We bought two metre square containers and linked them together. The rain from a 25m2 roof can fill both water butts in one or two rainfalls.
The containers have a tap at the bottom. We connected a short piece of hose pipe to each container using a screw-on hose connector (we found this on ebay). We connected both pieces of hosepipe to a three way hose connector then attached another short piece of hosepipe to this with a sprayer on the end. I could buy a pump to the containers so I could attach a long hose but I haven’t. We have built a cupboard around the water butts to keep out the sunlight to prevent algae growing in the tanks. We covered the roof with an old pond liner and made a green roof on top.
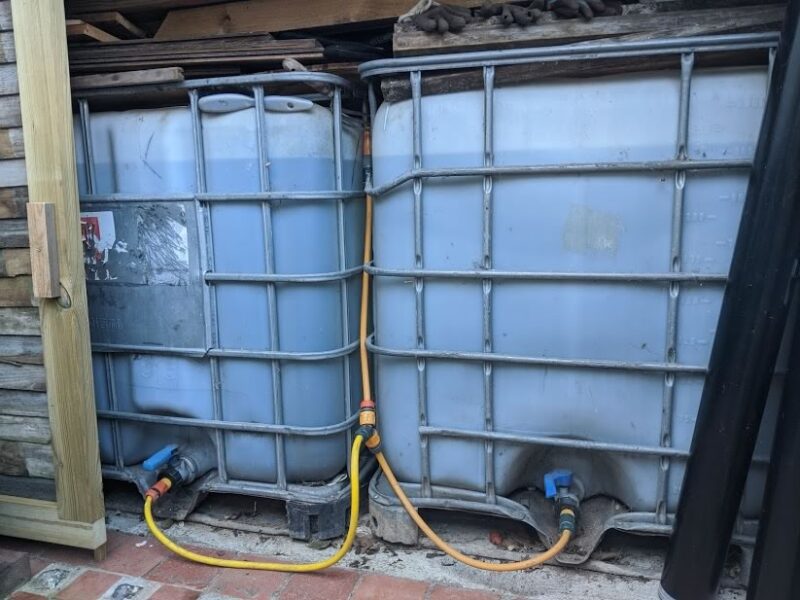
2000 litres water!
Please send us you tips for saving water.
Update:
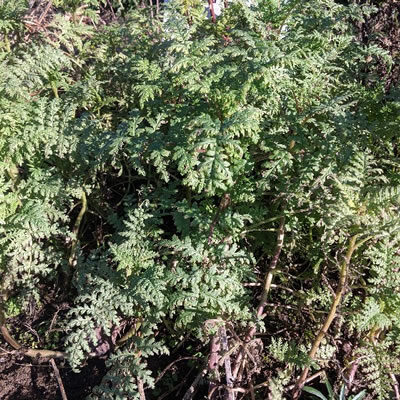
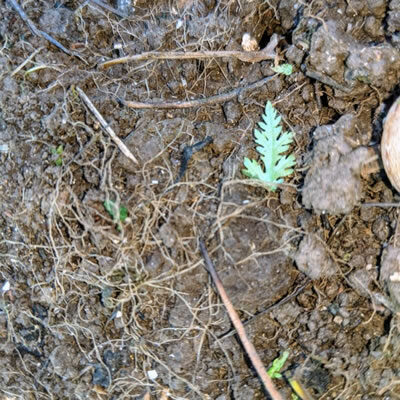
This past winter I sowed a green manure of Phacelia in my flower beds. After the very wet winter last year I thought I’d try this to prevent the soil and nutrients washing away. Plant roots can be seen in the centre photo. This shows how some soil has washed away but the plant roots have held onto a lot of the soil too. Instead of digging up the plants this spring, I cut the plants down to the ground and left them on top of the beds to rot down there. They had disappeared within one week. The roots will also rot down slowly in the soil in time to feed the next plants to be planted.